
A wall rarely fails all at once. More often, it starts with a faint tide mark, paint that no longer sits flat, or a room that smells slightly stale after the windows have been shut. By the time the plaster softens or mould becomes visible, the repair cost has usually moved well beyond a simple fix. If you need to detect wall moisture before damage, the key is to act on subtle changes early and confirm the source properly before any cosmetic repair begins.
Moisture in walls is not a minor housekeeping issue. It can point to concealed pipe leaks, failed waterproofing, cracked external façades, roof ingress, leaking shower lines, condensation problems, or drainage faults. For homeowners, that means damaged finishes, mould risk and rising utility bills. For facilities teams, landlords and commercial operators, it can mean tenant complaints, asset deterioration, claim disputes and avoidable disruption.
Why early wall moisture detection matters
The financial difference between early detection and delayed action is significant. A small concealed leak inside a wall cavity may only require localised repair if found quickly. Left unchecked, the same issue can spread through insulation, flooring junctions, skirting, joinery and adjacent rooms. In commercial and industrial environments, hidden moisture can also affect electrical systems, finishes, stock areas and operational uptime.
There is also a diagnostic reason to move early. Fresh moisture patterns are easier to trace than long-standing saturation that has spread across multiple building elements. Once water migrates through porous materials, the visible symptom may appear far from the actual failure point. That is where many repair attempts go wrong. The stain gets painted over, the surface is patched, but the root cause remains active behind the wall.
How to detect wall moisture before damage becomes visible
Early warning signs are often small, but they tend to cluster. A single mark may not mean much. Several symptoms appearing together usually justify testing.
Pay attention to paint that bubbles, flakes or develops hairline cracking in one localised area. Plaster that feels cooler than the surrounding wall can also indicate active moisture. You may notice skirting boards swelling, timber trim pulling away, or a persistent musty odour that returns even after cleaning. In tiled bathrooms or kitchens, discoloured grout lines, loose silicone joints and unexplained dampness near service walls can all point to concealed moisture migration.
In many properties, occupants first notice the problem indirectly. A room feels humid when the rest of the house does not. A wall backing onto a bathroom, riser, roof parapet or exterior elevation develops repeated staining. In managed buildings, maintenance teams may see recurring paint failures in the same stack of units. These patterns matter because they help narrow down whether the problem is plumbing-related, waterproofing-related or environmental.
The difference between moisture symptoms and moisture sources
One of the most expensive mistakes in building maintenance is treating the symptom as the source. A damp patch on an internal wall does not automatically mean the leak is directly behind it. Water travels. It can move along conduits, slab edges, blockwork joints and pipe routes before becoming visible.
This is why visual inspection alone has limits. It is useful as a first step, but not as a final diagnosis. A wall may appear dry on the surface while retaining elevated moisture deeper within the substrate. Equally, a visible damp mark may be old while the active leak is somewhere else entirely. Proper interpretation depends on moisture profiling, thermal behaviour and an understanding of how building assemblies handle water.
For example, moisture caused by condensation behaves differently from moisture caused by pressurised pipe leakage. Condensation often appears on colder surfaces, in corners, behind furniture and in poorly ventilated spaces. A concealed plumbing leak is more likely to create a localised anomaly that worsens regardless of occupancy patterns or weather. Rain ingress may correlate with wind direction or façade exposure. Rising damp, where relevant, tends to present lower down the wall with a more consistent vertical pattern. It depends on the construction type, age of the building and service layout.
The most reliable ways to detect wall moisture before damage
A proper moisture investigation usually combines more than one method. That matters because no single tool tells the whole story.
Moisture meters
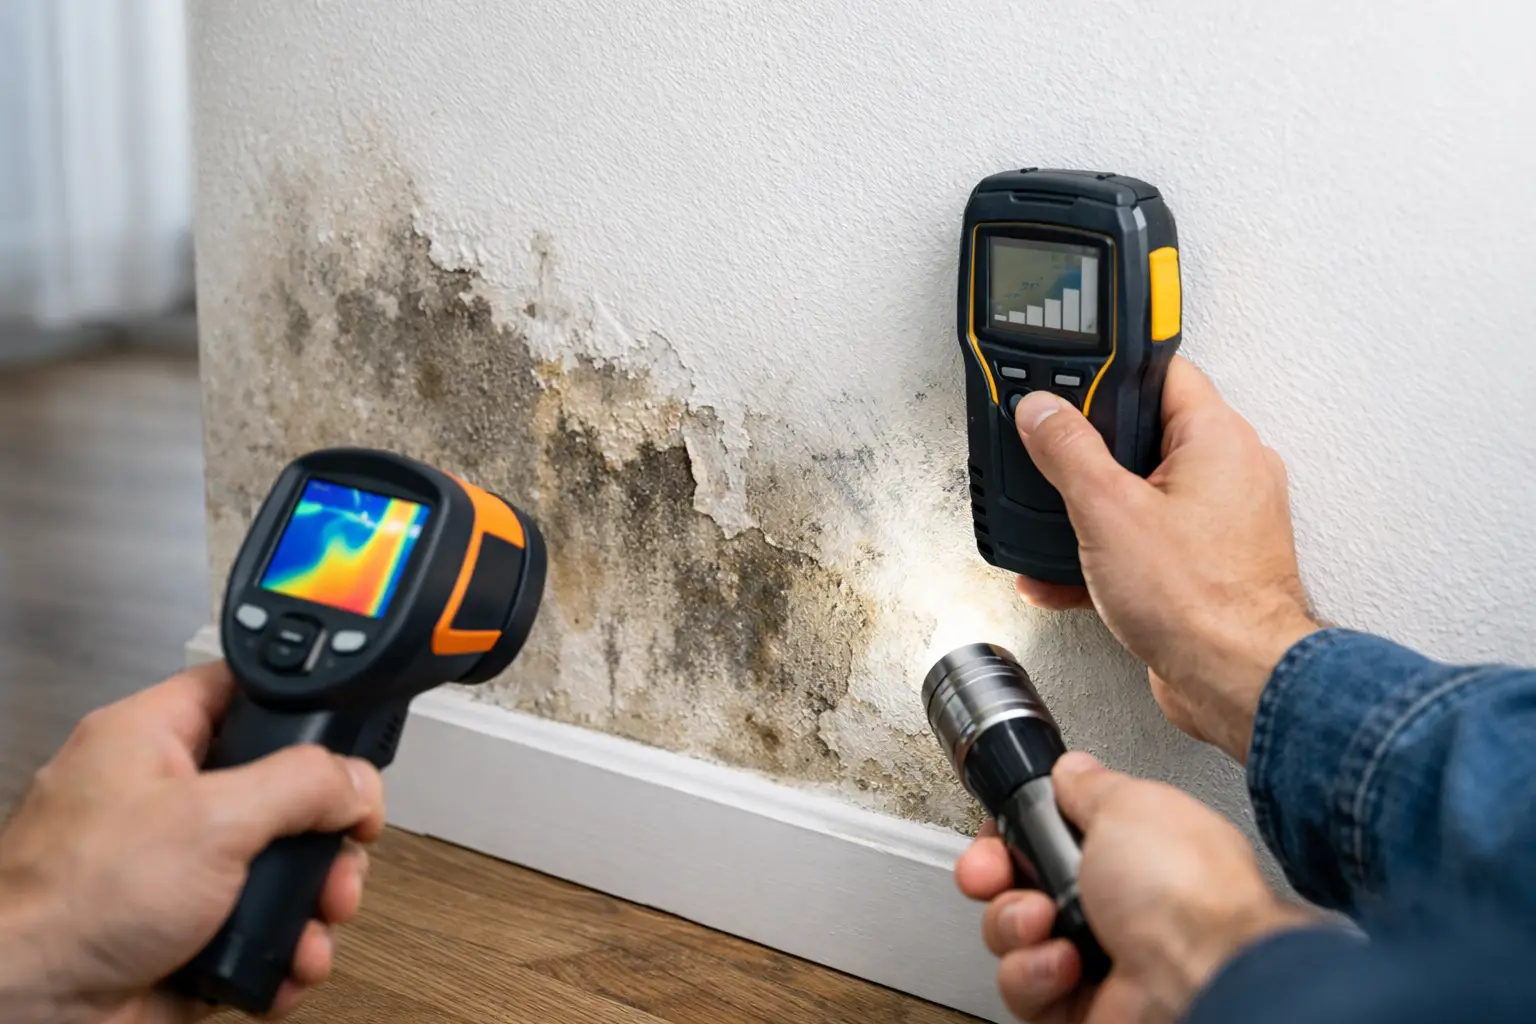
Handheld moisture meters can provide a quick indication that a wall contains elevated moisture. They are useful for screening affected zones and comparing wet and dry areas. However, readings need careful interpretation. Surface coatings, salts, foil-backed materials and different substrates can affect results. A meter can confirm suspicion, but it should not be treated as proof of the leak source on its own.
Thermal imaging
Thermal imaging is one of the most effective non-invasive ways to identify temperature anomalies associated with moisture. Wet materials often heat and cool differently from dry ones, creating a visible thermal pattern. This can help define the spread of moisture behind finishes and guide more targeted inspection.
That said, thermal imaging is not simply a matter of pointing a camera at a wall. Accurate interpretation depends on ambient conditions, material type, recent water use and the technician’s understanding of building science. A cold patch can indicate moisture, but it can also reflect air leakage, thermal bridging or shade effects. Experience is what separates useful diagnostics from guesswork.
Acoustic and pressure-based testing
Where a concealed plumbing leak is suspected, acoustic sensors and pressure testing can help confirm whether the pipework is losing water. These methods are especially valuable when moisture appears near bathrooms, kitchens, service shafts or buried pipe routes. Instead of breaking into multiple wall sections, technicians can narrow the search to the most likely failure area.
Tracer gas and specialist diagnostics
In harder cases, particularly where systems are concealed or previous repairs have failed, tracer gas testing can locate very small leaks with a high degree of precision. This is often relevant in larger properties, commercial buildings and technical environments where accuracy matters more than trial-and-error opening up.
When DIY checks are useful and when they are not
There is a place for basic occupant checks. If you suspect wall moisture, note where it appears, whether it changes after shower use or rainfall, and whether your water bill has increased unexpectedly. Look for patterns near wet areas, external walls, ceilings and service risers. These observations can help speed up professional diagnosis.
What you should avoid is assuming the cause and repairing the finish too early. Repainting a damp wall, resealing random joints or replacing plaster without testing the source usually delays the real fix. In some cases it also traps moisture, making the wall slower to dry and the eventual repair more extensive.
For property managers and commercial operators, delay carries another risk. If moisture affects occupied areas, common parts or critical infrastructure, the issue can escalate from maintenance nuisance to operational problem quickly. Complaints, mould concerns, damaged finishes and repeat contractor visits all cost more than a focused diagnostic approach at the outset.
What a professional moisture investigation should deliver
A credible moisture inspection should do more than confirm that a wall is wet. It should identify the most likely source, define the affected area, distinguish active from historic moisture where possible, and recommend the next action with minimal disruption.
That may include non-destructive leak detection, targeted opening only where justified, or further testing of waterproofing, drainage or internal pipework. In higher-value or operationally sensitive environments, documented findings are equally important. Facilities teams, insurers and asset managers often need clear reporting to support repair scope, contractor accountability and remedial planning.
This is where engineering-led diagnostics make a practical difference. The aim is not to create a dramatic survey report. It is to reduce uncertainty, avoid unnecessary demolition and shorten the path from suspicion to verified repair. That approach is central to how specialist teams such as LeakDtech handle persistent or concealed moisture problems across residential, commercial and industrial sites.
Preventing repeat moisture damage after the leak is found
Finding the leak is only part of the job. The wall assembly must also be allowed to dry properly, and any failed material must be assessed before reinstatement. If finishes go back too soon, staining, blistering and mould can return even after the water source has been repaired.
Prevention also depends on cause. A plumbing leak needs a verified pipe repair. Rain ingress may require façade sealing, roof detailing corrections or waterproofing reinstatement. Condensation issues call for a different strategy centred on ventilation, insulation and humidity control. This is why accurate diagnosis matters so much at the beginning. Different causes can look similar on the wall, but they do not require the same remedy.
If you are trying to detect wall moisture before damage becomes expensive, the smartest move is not to wait for a dramatic sign. A small stain, a localised odour or one repeat patch of failed paint is often the point where the repair is still manageable, the disruption still limited, and the root cause still traceable.